
Overview
Before clerks can work tickets and cases, set up your court's own details and the people and agencies that appear on them. Everything in this article is under Court > Settings, on these tabs:
- Court Profile: the court's name, codes, address, courtrooms, judges, and prosecutors.
- Agencies: the law enforcement agencies that write your tickets.
- Officers & Badges: the officers who write tickets, each linked to an agency.
- Attorney: the defense attorneys who appear on your cases.
Set them up in this order. Officers need an agency, so add agencies first.
Before you start
- You need Court settings access.
- Have the court's ORI, jurisdiction code, and mailing address ready, plus agency ORIs and officer badge numbers.
Step 1: Fill in the Court Profile
- Go to Court > Settings. The Court Profile tab opens first.
- Under Court Details, enter:
- Court Name (required): up to 40 characters. Letters, numbers, spaces, and , ' - ( ) only.
- Court Jurisdiction Code (required): up to 5 letters.
- Court Type, for example Municipal.
- Court ORI: up to 9 letters or numbers, no spaces.
- Arresting Agency and Arresting Agency ORI, plus the Department of Safety for the city and county if you use them.
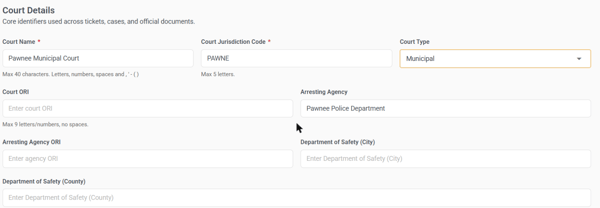
- Under Court Location, enter the street address, state, city, ZIP code, and phone number. This address and phone number print on notices and letters.

- Click Save Changes at the bottom of the page.
Step 2: Add courtrooms, judges, and prosecutors
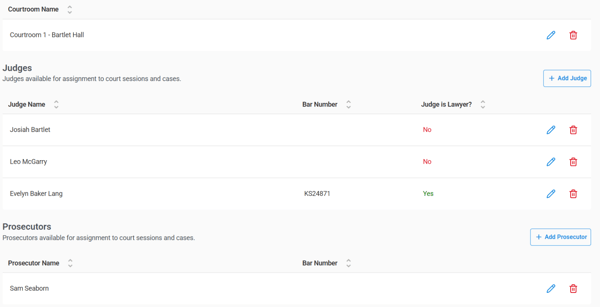
These lists are at the bottom of the Court Profile tab. Clerks pick from them when they schedule court sessions and assign cases. Save the Court Details in Step 1 first. Until then, the page tells you to initialize the city settings before adding courtrooms, judges, or prosecutors.
- Courtrooms: click Add Courtroom, enter the Courtroom Name, and click Save. The name prints on session schedules and dockets.
- Judges: click Add Judge. Enter First Name and Last Name (required). Add the Bar Number if the judge has one (up to 20 letters or numbers, no spaces or symbols). Answer Judge is Lawyer? (Yes or No). Click Save.
- Prosecutors: click Add Prosecutor, enter the name and bar number the same way as for a judge, and click Save.
Each one saves when you click Save in its panel. To change or remove one later, use the pencil or trash icon on its row.
Step 3: Add law enforcement agencies
- Go to the Agencies tab. Use the arrow at the right end of the tab bar if you can't see it.
- Click Add Agency.
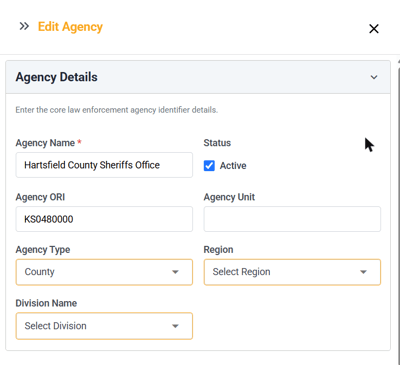
- Under Agency Details, enter:
- Agency Name (required). Leave out apostrophes for now. See Good to know.
- Agency ORI: up to 9 characters.
- Agency Type: Federal, State Police, Other State Agency, City, County, University or College, Tribal, or Other.
- Agency Unit, Region, and Division Name if you use them.
- Leave Active ticked.
- Under Agency Contact & Address, enter the agency's address, phone number, and email address.
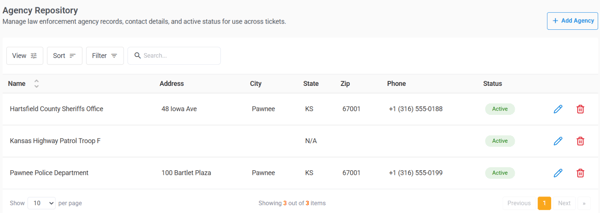
- Click Save. The agency shows in the Agency Repository.
Step 4: Add officers
- Go to the Officers & Badges tab and click Add Officer.
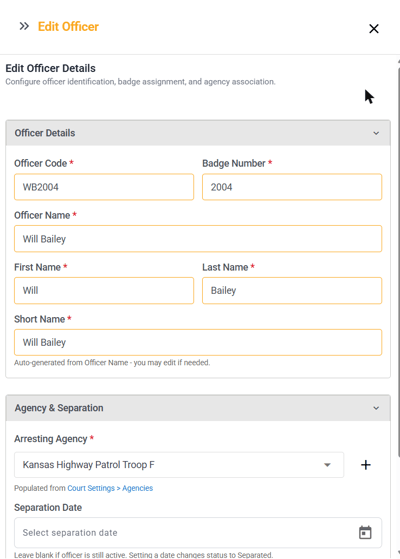
- Under Officer Details, enter:
- Officer Code and Badge Number (both required). Use the officer code that appears on the agency's tickets.
- Officer Name, First Name, and Last Name (all required).
- Short Name fills in from the officer name. You can change it.
- Under Agency & Separation, pick the officer's Arresting Agency. The list comes from the Agencies tab. Use the + button next to it to add a missing agency.
- Leave Separation Date blank for an active officer.
- Click Save Changes. The officer shows in the list with status Active.
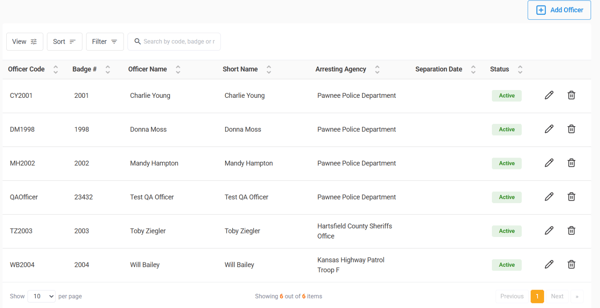
When an officer leaves, edit the officer and enter a Separation Date. Their status changes to Separated. When you save a change to an officer, the system tells you the change applies to all new tickets and cases that use that officer. Click Save to confirm.
Step 5: Add attorneys
- Go to the Attorney tab and click Add Attorney.
- Under Attorney Details, enter First Name and Last Name (required) and the Bar Number (up to 20 characters). Leave Status set to Active.
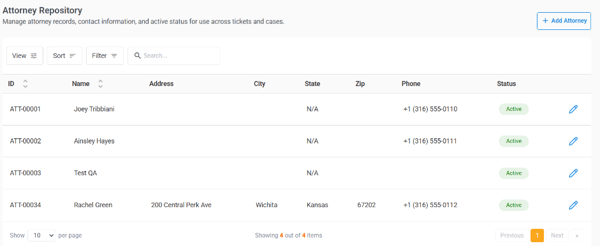
The Attorney ID fills in by itself when you save, for example ATT-00034. You can't change it.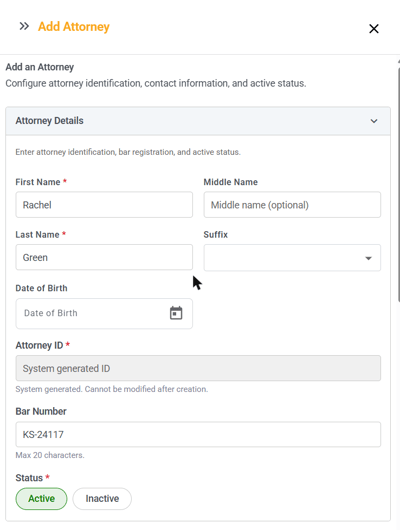
- Optional: open Driver's License and Contact & Address to add the attorney's license, address, phone number, and email address.
- Click Save Changes. The attorney shows in the Attorney Repository.
What you'll see
- Your court name, address, and phone number on printed notices and the docket.
- Your courtrooms, judges, and prosecutors in the lists when you set up court sessions and cases.
- Your agencies and officers on tickets.
- Your active attorneys when you record an attorney on a case.
Good to know
- Leave apostrophes out of agency names for now. If an agency name has an apostrophe, for example Sheriff's Office, officers linked to it won't save. Nothing tells you the save failed. Type Sheriffs Office instead.
- To stop using an attorney, edit them and set Status to Inactive. To stop using an agency, untick Active.
- State conviction reporting credentials are set from the State Reporting Settings button on the Court Profile tab. That's covered in the state reporting article.
- Next, set up your court's finances: GL distributions, fees, payment order, and the Offense Library.
See also
- How to set up court finances: GL distributions, fees, payment order, and offenses
- How to set up action codes, document templates, and dockets