
Key Features
- Access pre-generated reports across eight report categories
- Customize report columns using the view selector
- Filter, sort, and search within any report
- Save custom views for all users in your organization
- Export reports to Excel (.xlsx), CSV, or PDF
- Redownload previous exports from the Export History tab
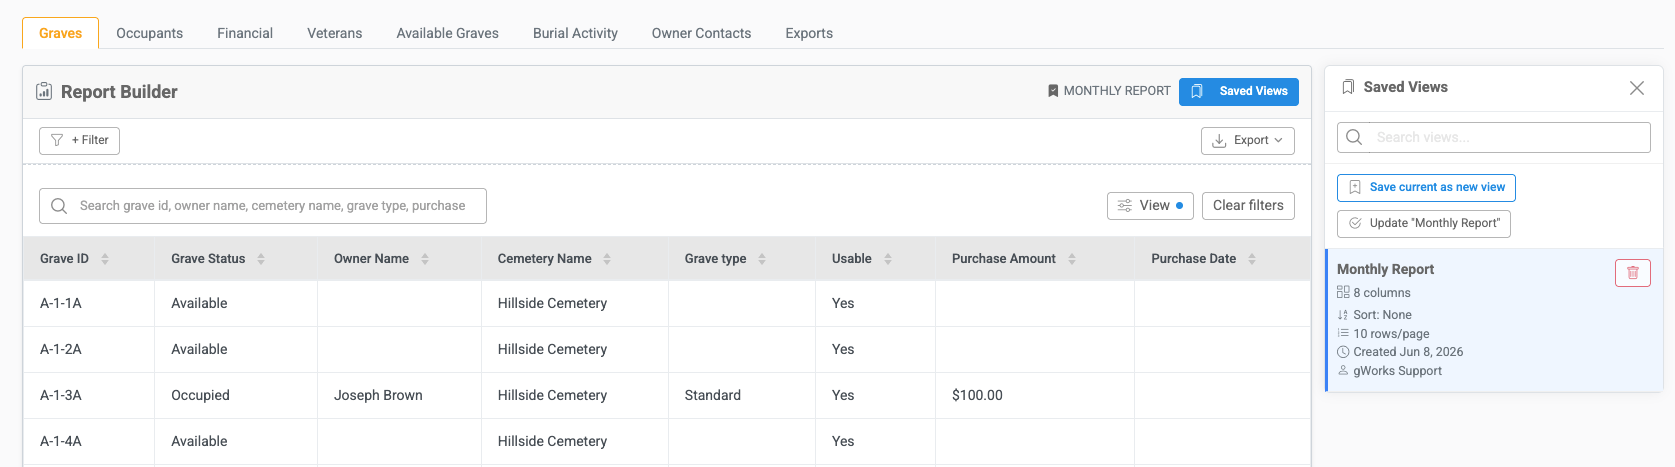
How to Access Reports
Go to Cemetery → Reports
Select a tab at the top to choose your report type.
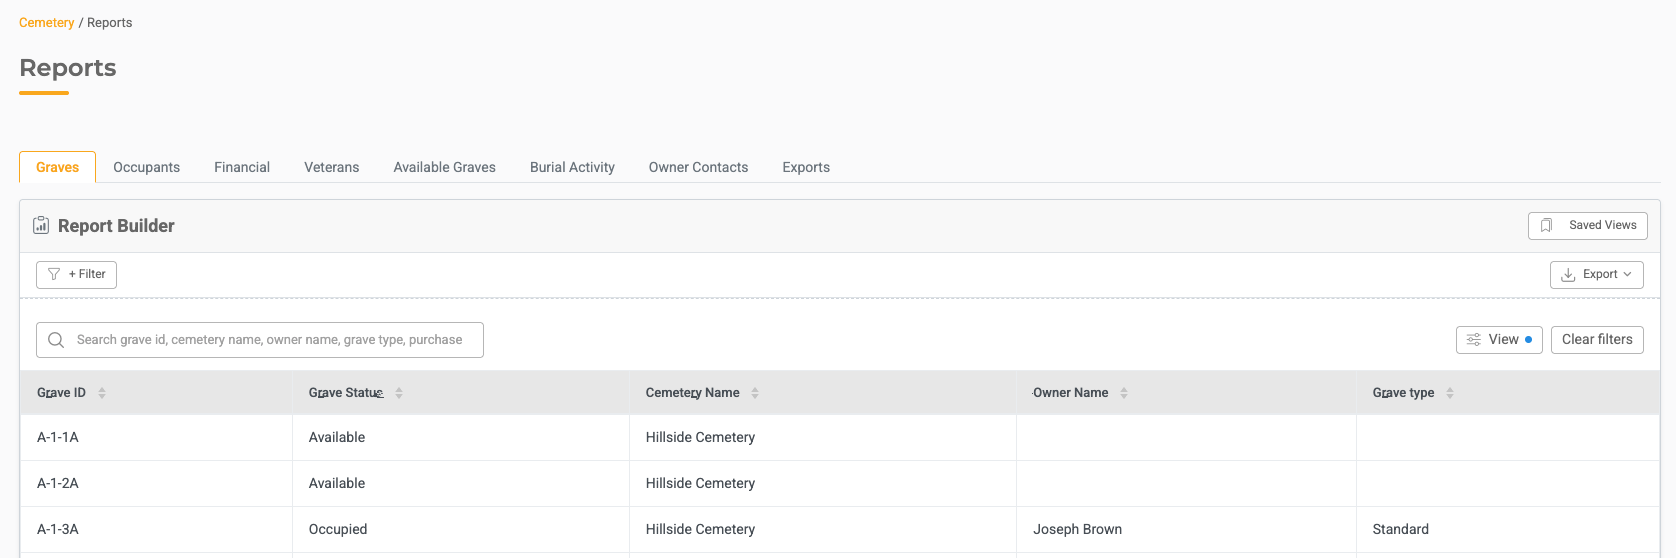
Report Types
The following report tabs are available:
1. Graves - Pulls all grave IDs in the system
Default Columns
- Grave ID
- Grave Status
- Cemetery Name
- Owner Name
- Grave Type
Additional Columns (via View)
- Usable
- Multiple Burial
- Purchase Amount
- Purchase Date
- Comments
2. Occupants - Pulls all occupant records in the system
Default Columns
- Occupant Name
- Date of Birth
- Gender
- Burial Type
- Date of Death
Additional Columns (via View)
- Maiden Name
- Married
- Church
- Funeral Home
- Date of Birth
- Date of Death
- Notes
- Inscription
- Veteran
- Branch
- Era
3. Financial - Pulls all existing grave IDs with financial information
Default Columns
- Deed Number
- Grave ID
- Purchase Amount
- Purchase Date
- Grave Status
- Cemetery Name
- Owner Name
Additional Columns (via View)
- Usable
- Multiple Burial
- Comments
- Grave Type
4. Veterans - Pulls only records where the veteran toggle is turned on. This report is limited to confirmed veterans.
Default Columns
- Occupant Name
- Grave ID
- Date of Birth
- Gender
- Burial Type
- Branch
- Era
- Date of Death
- Date of Burial
Additional Columns (via View)
- Maiden Name
- Relation
- Married
- Church
- Funeral Home
- Notes
- Inscription
5. Available Graves - Pulls only graves where the grave status is Available. Use this report to quickly identify open grave inventory.
Default Columns
- Grave ID
- Deed Number
- Comments
- Grave Status
- Cemetery Name
- Grave Type
Note: No additional columns are available in View for this report.
6. Burial Activity - Pulls the historical log of every grave, showing a full audit trail of actions taken
Default Columns
- Date
- Grave ID
- Action
- Description
- Performed By
Additional Columns (via View)
- Cemetery
- Grave Status
- Usable
- Grave Type
- Multiple Burial
- Purchase Amount
- Purchase Date
- Deed Number
- Comments
- Owner Name
7. Owner Contacts - Pulls all existing owner records with contact information
Default Columns
- Owner Name
- Address Line 1
- Address Line 2
- City
- State
- Zip
- Phone Number
Note: No additional columns are available in View for this report.
Customizing Reports
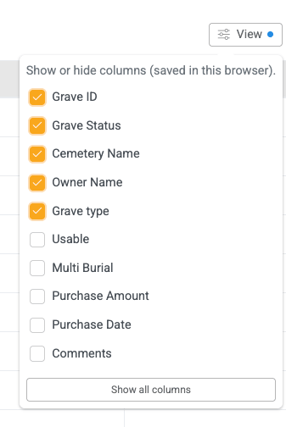
Adding or Removing Columns
Each report supports adding extra columns beyond the default view.
- Click View in the top right corner of the table
- Select the additional columns you want to display
- The table updates immediately
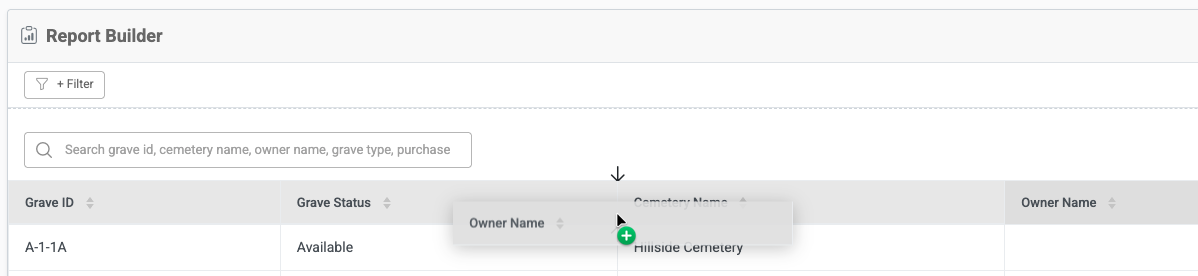
Reordering Columns
- Drag and drop column headers to reorder them within the table
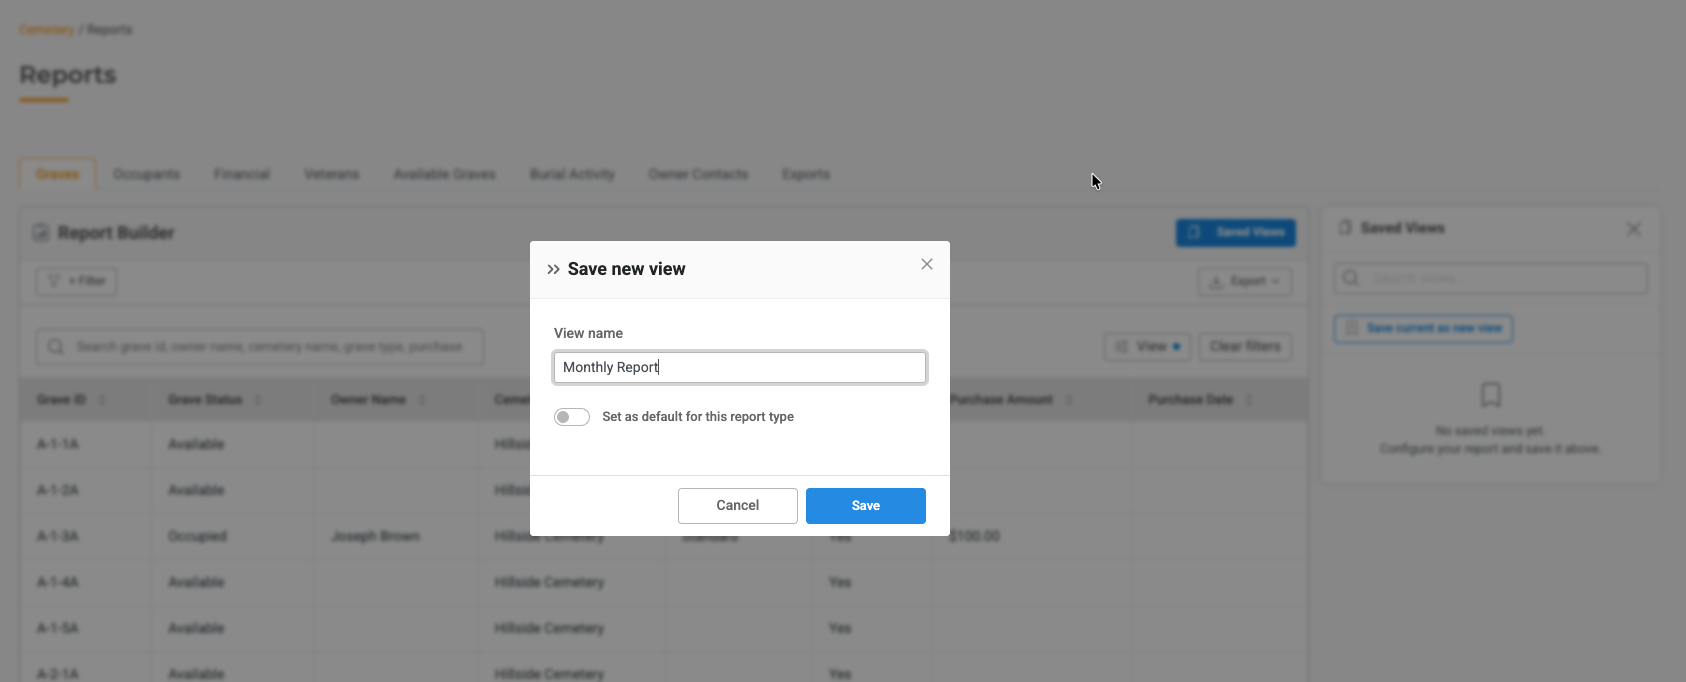
Saving a View
Saved views are shared across all users who have access to Cemetery — they are not personal views.
- Click Saved Views
- Click Add New View
- Enter a name for the view
- Click Save
The saved view will now be available to all users in your organization.
Filtering, Sorting, and Searching
Filtering
- Click Filter in the top left corner of the table
- Select the criteria to narrow the report (e.g., filter by a specific cemetery)
- To remove all filters, click the Clear Filters button in the top right corner of the table
Sorting
- Click any column header to sort ascending or descending
Searching
- Use the search bar to search across any fields currently displayed in the table
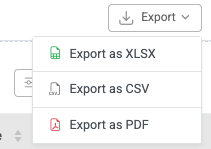
Exporting Reports
You can export any report to one of three formats:
- Excel (.xlsx)
- CSV
To export, click the Export button and select your preferred format. Every export is logged automatically.
Export History
The Export History tab tracks every file that has been generated. This allows you to access historical snapshots of reports even after data has changed.
What You Can Do in Export History
- Search by any detail in the table
- Sort by any column, ascending or descending
- Filter by Report Type (the report tab used) or format (XLSX, CSV, or PDF)
- View the number of records and file size for each export
- Redownload a previous export
- Delete an export from history
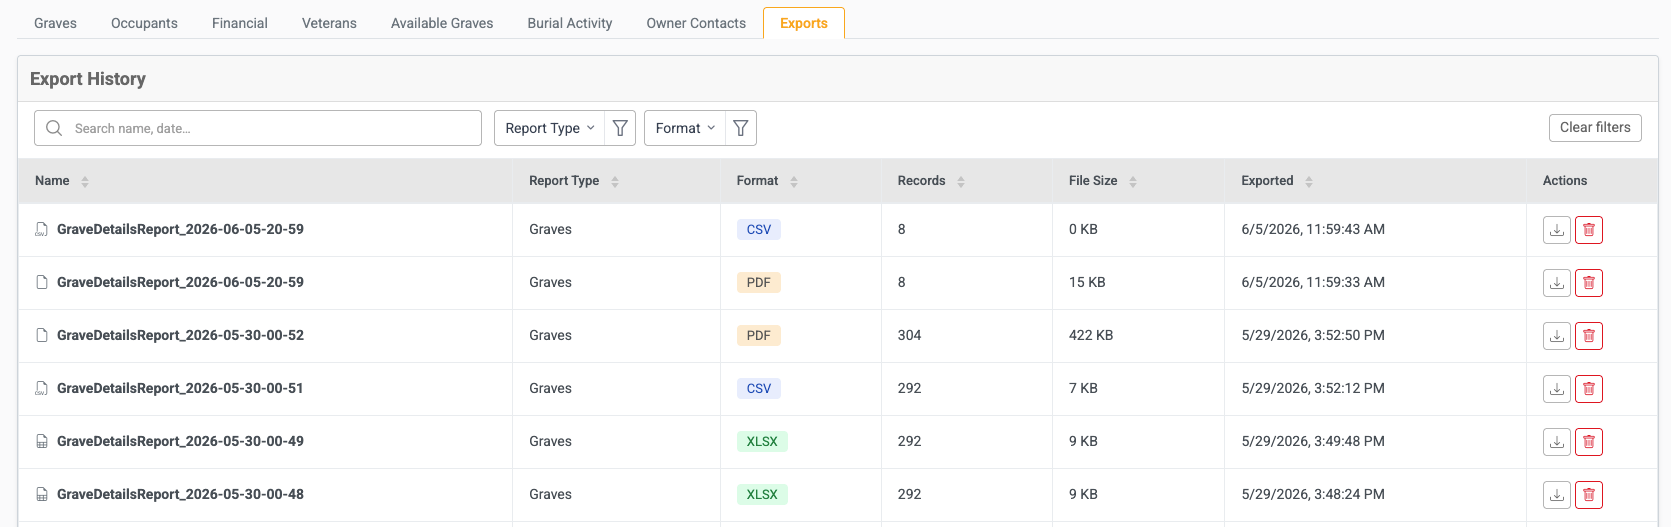
Note: Files are only generated when you click Export from one of the report type tabs. Viewing a report does not create an export entry.
Helpful Tips
- Use Saved Views to standardize reporting across your team
- Use the Available Graves report to monitor inventory at a glance
- Use the Veterans report to quickly pull a list of all veterans for recognition events
- Use Burial Activity to audit recent changes or verify that a burial was recorded correctly
- Redownload past exports from Export History if you need a point-in-time snapshot of data
Troubleshooting
Issue: A report is not showing the columns I need.
Fix: Click View in the top right corner of the table to add available columns for that report type.
Issue: I filtered the report but now I can't see all records.
Fix: Click the Clear Filters button in the top right corner of the table to reset all active filters.
Fix: Confirm the view was saved using the Saved Views menu. Saved views are shared with all users who have cemetery access.
Issue: I need to reference a report from a previous month.
Fix: Check Export History to redownload a previously exported file.